
Authenticative SMTP
How to setup outgoing authenticative SMTP server in Outlook Express
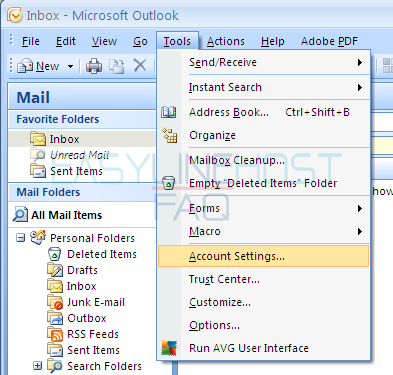
- Outlook 2007 and earlier versions: click in top bar ‘Tools’ -menu ‘Account settings’.
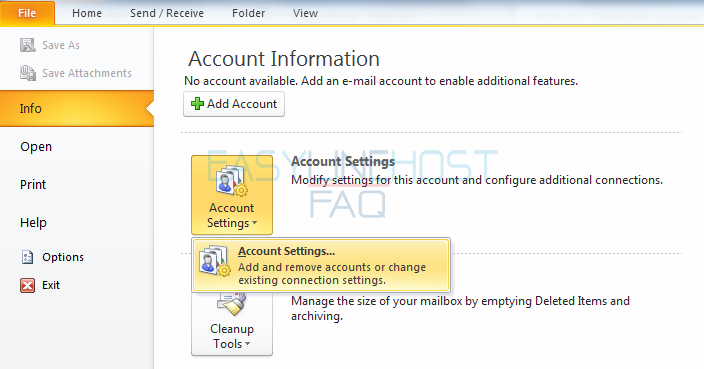
- Outlook 2010 and newer versions: click ‘File’ → ‘Info’ and click ‘Account Settings’ -button.
Setting up outgoing mail server with existing account
NOTE! If you don’t have existing account set up in Outlook Express, see instructions here.
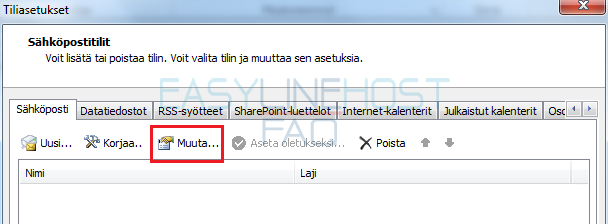
- To edit your accounts settings click ‘Change…’ in the ‘Account Settings’ -window.
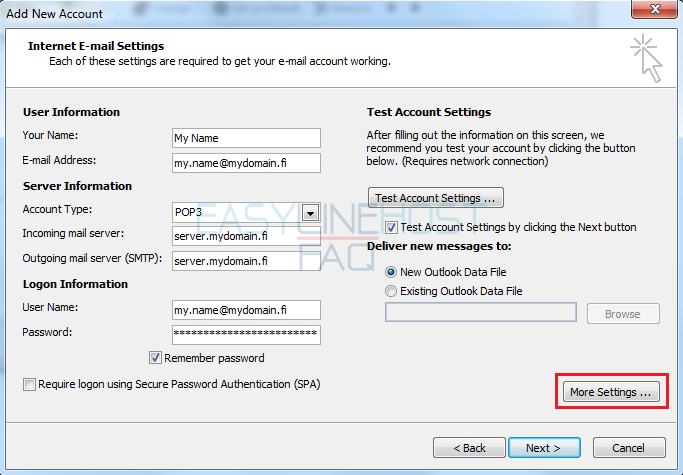
- In ‘Outgoing: (SMTP)’, write your service providers outgoing mail server address.
- The most common of these are:
- Sonera: mail.inet.fi
- Saunalahti: mail.inet.fi
- DNA: mail.inet.fi
- Welho/HTV: mail.inet.fi
- MBNet: mail.inet.fi
- Elisa: mail.inet.fi
- Auria: mail.auriamail.net
- SongNetworks: smtp.song.fi
- Click ‘More Settings’ -button to set up your login information for server in question.
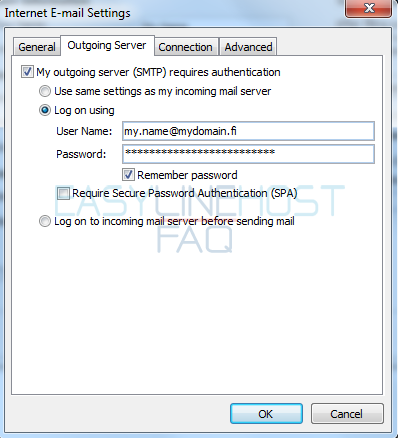
- Click ‘Outgoing Server’ -tab, and select ‘My outgoing server (SMTP) requires authentication’ and ‘Log on using’.
- After this you can fill in your username and password for outgoing server.
- Click ‘OK’ -button to accept settings and to return to previous window. In this window click ‘Next’ -button to finish setup.
Setting up outgoing mail server and new mail account
NOTE! If you want to set up outgoing mail server with existing account, click here.
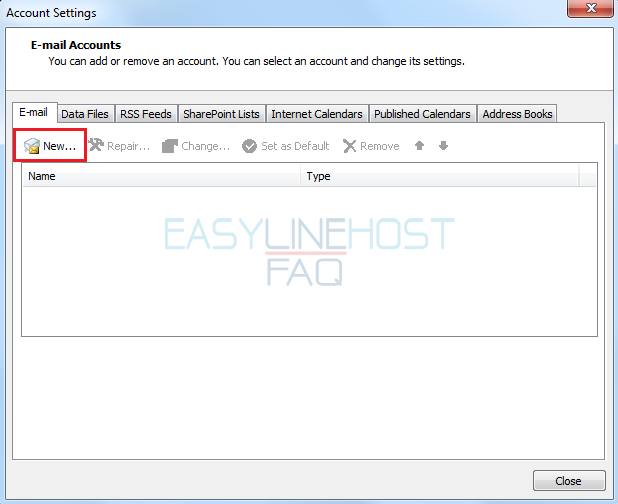
- To create a new account, click ‘New…’ -button in the ‘Account Settings’ -window.
- Select ‘E-Mail Account’ for type and click ‘Next’
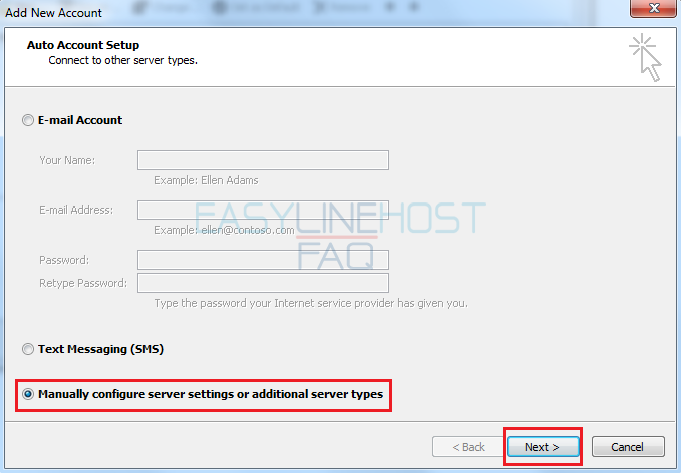
- Select ‘Manually configure server settings or additional server types’ and click ‘Next’.
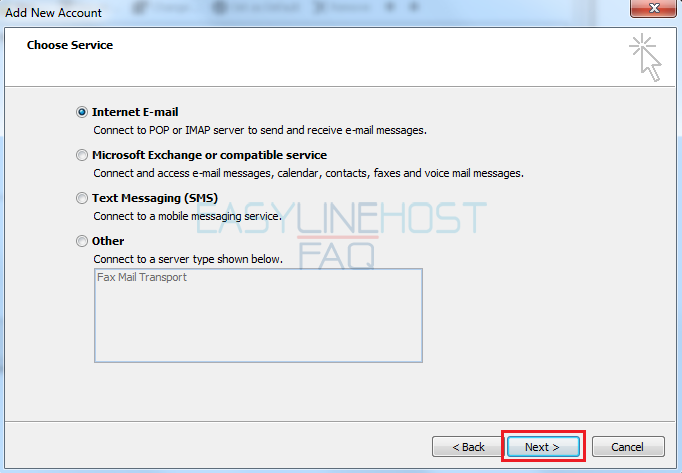
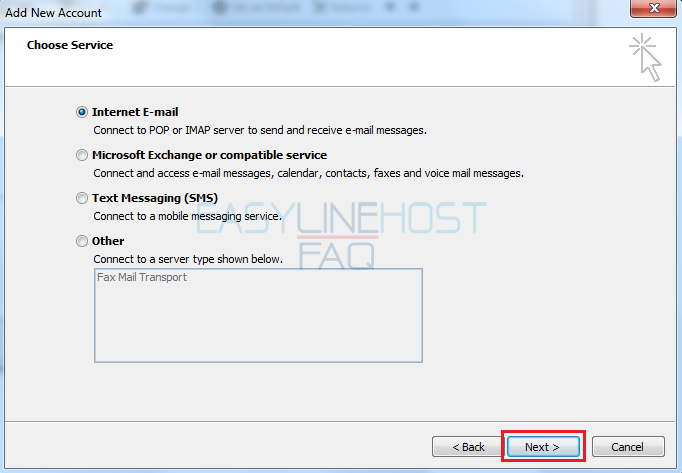
- Select ‘Internet E-mail’ as service type and click ‘next’ to continue.
- Fill in the form with server -and login information given to you.
- In Username and E-mail address’ -fields, write your whole email address created in control panel.
- Choose from ‘Incoming:’ -dropdown list the protocol you wish to use:
- POP3: If this is chosen, the program will automatically download all incoming messages to your PC and erase those messages from server. Good thing about this is, that the serverside mailbox will never fill up, but the downside is that you can’t read your messages from anywhere else, but your own computer.
- IMAP: This protocol shows you messages from your serverside mailbox, and doesn’t erase them. This allows you to read your mail from anywhere. With this you have to be careful with your mailbox filling up and you have to manually erase old messages.
- In ‘Server hostname – Incoming:’, write incoming mail address:
- Server address is imap.yourdomain.ending or pop.yourdomain.ending
- For example imap.yourdomain.com or pop.mydomain.net.
- In ‘Outgoing: (SMTP)’, write your service providers outgoing mail server address.
- The most common of these are:
- Sonera: mail.inet.fi
- Saunalahti: mail.inet.fi
- DNA: mail.inet.fi
- Welho/HTV: mail.inet.fi
- MBNet: mail.inet.fi
- Elisa: mail.inet.fi
- Auria: mail.auriamail.net
- SongNetworks: smtp.song.fi
- In ‘Password’ -field write your password you defined for your account in control panel and click ‘More Settings…’ -button.

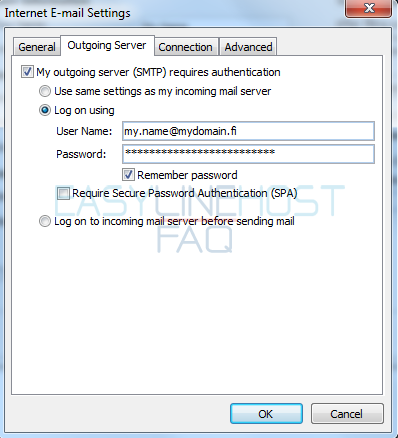
- Click ‘Outgoing Server’ -tab, and select ‘My outgoing server (SMTP) requires authentication’ and ‘Log on using’.
- After this you can fill in your username and password for outgoing server.
- Click ‘OK’ -button to accept settings and to return to previous window. In this window click ‘Next’ -button
- Your account is now created and you are ready to start using it. Click ‘Done’ to finish.
